
If there is one thing that has completely revolutionized our homeschool, it’s notebooking. Not only is notebooking a beautiful art form; it also packs a huge punch, covering spelling, grammar, sentence structure, vocabulary, handwriting and reading comprehension all in one fell swoop. Let me break it down.
What is Notebooking?
Simply put, notebooking is writing down what you’ve just learned, and adding an illustration. If you’re familiar with the Charlotte Mason philosphy, it is simply a written form of narration. Here’s how it works:
Step One: Telling Back
So if you are wanting to use notebooking in your history lessons, for example, you would simply read aloud a selection from your book of choice. Once you finished reading, you would ask your student what he or she heard you read. They may tell the entire story from start to finish, or they may share their favorite parts. While they are telling you back what you read, you are acting as a scribe, writing down what they’re saying. Depending on the age and level of your student, you may choose to write one sentence, two sentences or an entire paragraph. If they are able to formulate their own sentences without help, you can skip this step and they can begin writing as soon as you finish reading.
Step Two: Writing
Using a piece of cardstock paper, you will draw faint pencil lines across the paper, so that your student writes in straight lines. Leave half the paper unlined, so that they can illustrate later. Now- allow your student to write their sentences in pencil, copying what you wrote from when they were narrating back to you. This is the time to remind them of capitalization and punctuation. “Make sure your first letter is capitalized! The first letter of every sentence is capitalized! Also, be sure to finish your sentence with a period!” Once they’ve finished writing in pencil and all errors are corrected ( with love!), the student can now go over it with pen or fine tip markers. We use these. If you have a younger student and their hand is tired from writing their sentences the first time, feel free to ask them if you can go over their work in pen/felt tip marker. Once their writing is dry, you or your student can erase the faint pencil lines.
Step Three: Illustrating
Using your medium of choice, it is time for your student to illustrate their work. If they know what they want to draw, I like to pull up a simple picture of that thing on my phone or on my laptop. For example, if they’re wanting to draw a ship, I’ll type in “kids easy drawing of a ship” on google, select one that I think my student can work off of. They use this picture as a guide, usually sketching in pencil first. They can then outline the sketch in felt tip marker, and then fill in with color. We like to use watercolor, but colored pencils or high quality crayons work nicely too. Based on your child, you may decide to work on the illustration on a separate day than the writing. If you find that their hands are too tired after writing, simply split their notebooking page into two days: one for the writing, one for the illustration.
Step Four: Watercolor Wash
At the end of every week, go over your notebooking pages with a wash of watercolor paint. This means mixing up a little bit of watercolor paint with a lot of water, making a very subdued and light color. Then, with a large paint brush, simply wash over your page to create a beautiful background. With the pens I included above, they do not bleed or smear when used with watercolor. That being said, you can sweep the brush right over the writing. However, you must be a little careful around the illustration. If you used watercolor paints in your illustration, we don’t want those colors to bleed together. So, simply move your brush around the illustration, not directly over it. Once your student’s notebooking page is dry, the work is complete.
How I Store My Notebooking Pages
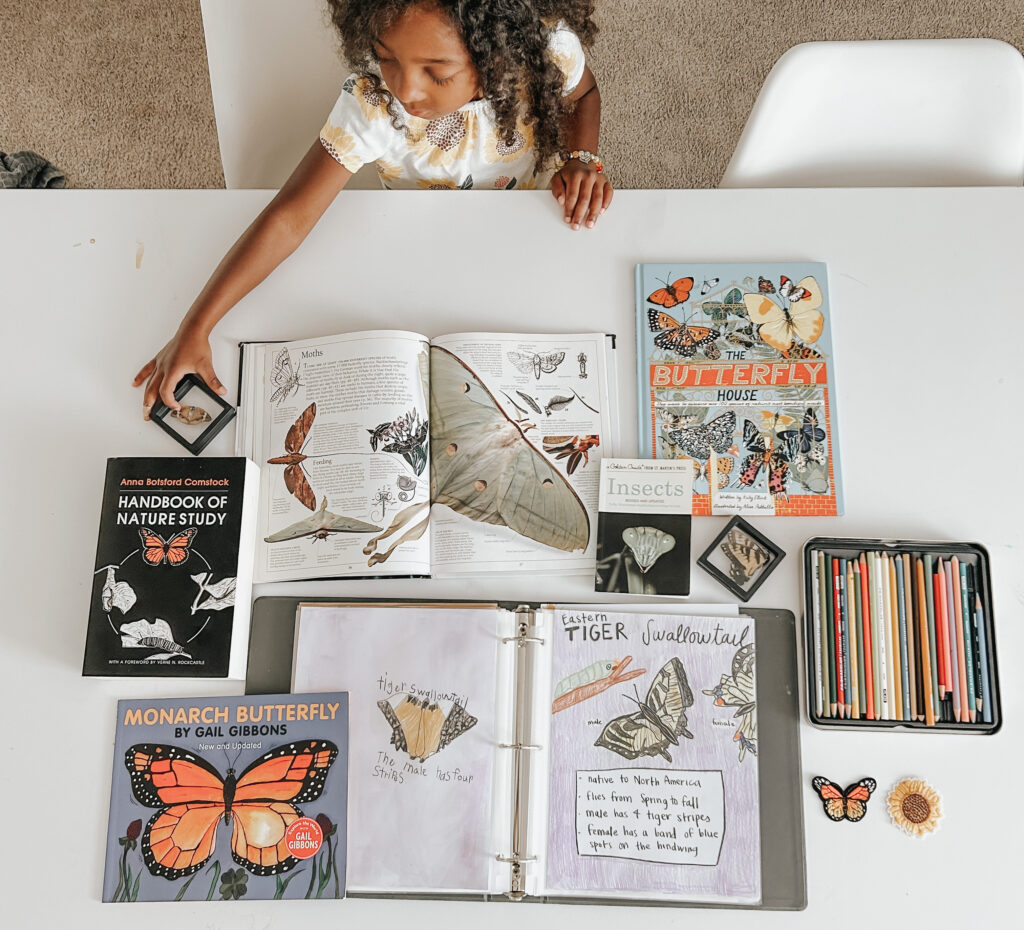
After their notebooking pages are dry and complete, I simply slide them into a clear sheet protector like this, and file them away into a beautiful binder. Here is the one we used for our 2nd grade year. If needed, you want want to put dividers into your binder, with tabs like history, nature study, Bible, etc. We even made a “preschool” tab for all of Lyon’s artwork!
What Makes Notebooking So Special?
Have you ever saved an old workbook that your child completed? What about an old textbook you used? Personally, I trash them. Chunky fill-in-the-blank textbooks aren’t exactly beautiful or nostalgic. But my childrens’ notebooking pages? THOSE are treasures. Instead of the rote memorization of a textbook, they are learning from a beautiful piece of literature and then creating their OWN book, completely made up of their own thoughts on what they learned. They will look back on their work with such delight and fondness, recalling not only what they wrote, but also where they were when they wrote it as well as what else they learned from that reading. If you’ve ever created something ( a painting with your husband, a DIY project, a special letter written to the Lord), you remember instantly when you look at it where you were and the process of creating it. Now combine that with the process of learning. My daughter can look at a page she created two years ago and recall everything from that lesson, simply because of her ownership of the lesson. This is powerful stuff!
Another wonderful reason to incorporate notebooking into your homeschool is that it can be done as a family. You can all come to the same table, listen to a chapter of a beautiful book, and each take away something different according to level of understanding. Older children can write paragraphs, spend longer on the illustration, paste additional photos, truly make it their own. Kindergarten students that are wanting to join in can simply copy a title (the topic of what you’re learning) and then draw a picture.
Additionally, if you live in a state that requires a portfolio of your homeschool year, your student’s notebooking pages couldn’t be more perfect to use!
One last thing to note: If your student is having a hard time with their illustrations, go ahead and assist them, maybe drawing the outline and letting them fill it in. Once a week or so, you may find it helpful (and super fun!) to incorporate drawing lessons into your homeschool. Drawing lessons for kids are super easy to find on youtube, or you can kind a drawing book for kids teaching them to draw hundreds of things! Here are some great drawing resources:
Art for Kids: The Only Drawing Book You’ll Ever Need
If they aren’t interested in drawing at all, don’t let that deter you from notebooking. They can print out a photo and use rubber cement to glue it to the page!
Final Thoughts
If the thought of notebooking stresses you out, leave it! But if it liberates you to think that you can replace art, grammar, spelling, handwriting, etc. with the beautiful practice of notebooking, then I’m so glad you stumbled upon this article. I’m going to link my Amazon Store here, because I have an entire Notebooking List, which is full of the colored pencils, watercolor sets, and everything else we use for notebooking. Feel free to start with one art medium, then add as you go. I hope this article brought inspiration and a sense of freedom, and if you have any questions, drop them below!

liked this post? leave a comment!